


I'd been wanting to make a picture board for our guest room. I wanted a place where I could put all my favorite pictures of the friends that would be frequenting the room. I eyed some of the ones being sold at Pottery Barn and besides being the wrong colors, I thought they were pretty expensive for what they were. Additionally, the fabulously talented Chatty Cricket made a picture board last year and it turned out beautifully. I knew I could do it.
So I picked out fabric that matched the room.
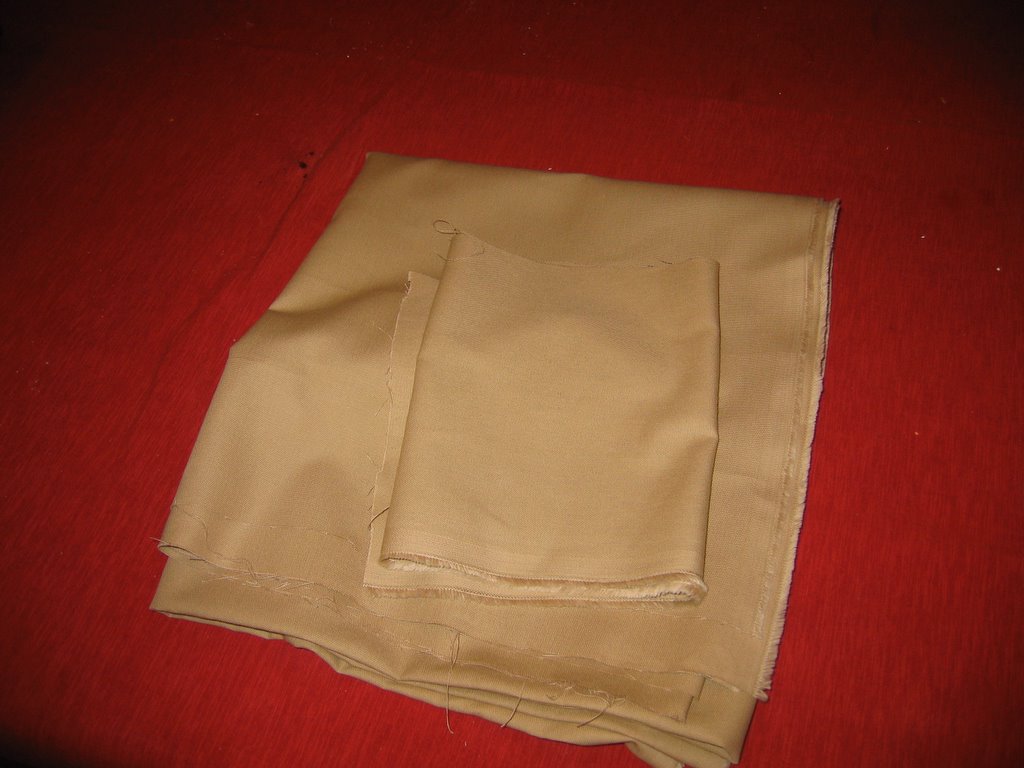
Green fabric on green walls would have been too much, so I picked a slightly contrasting tan that pulled a color out of the curtains.
I also purchase a canvas at an art store, whatever size is best for you. Mine is pretty big because the area above the bed where I'm hanging this is rather large. Any canvas that has a wooden frame will work. I waited for a sale, because a painter's canvas is expensive.
Then I gathered my tools:
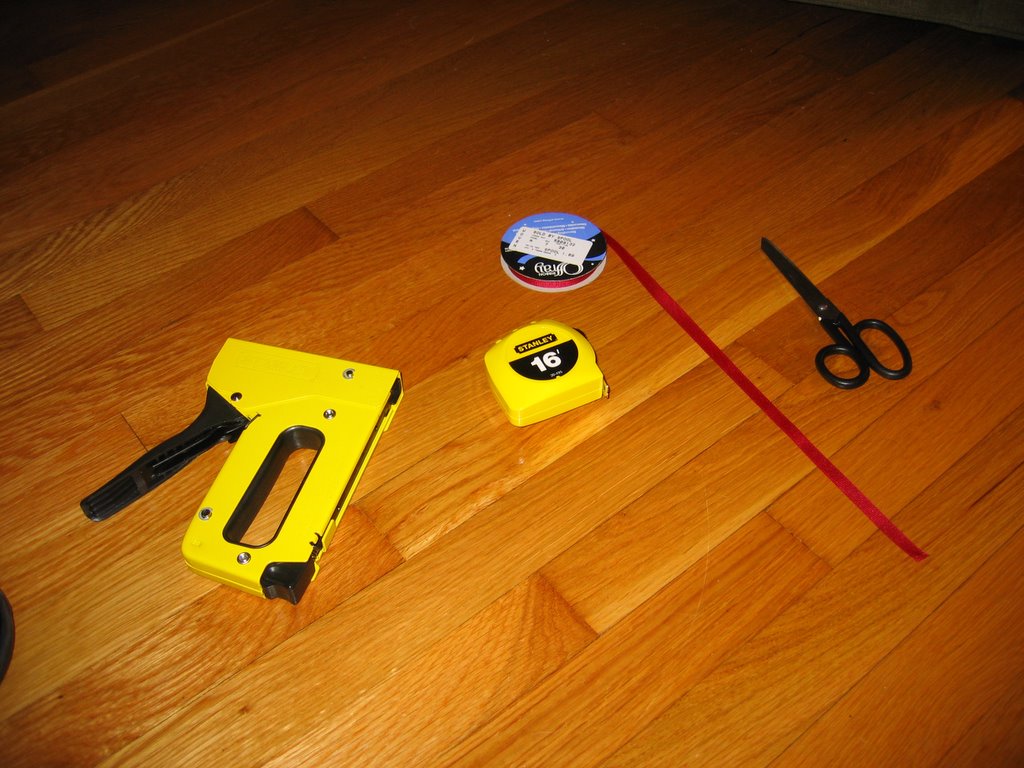
Staple gun
Tape measure
Color-coordinated ribbon (I needed two rolls)
Scissors (good for trimming fabric)
And I got to work. I criss-crossed along the length of the board first, forming a big X. I'd wrap the ribbon around the back and staple it down, holding it very taut. Then I started alternating sides, criss crossing each side, and measuring the distance to make sure the gaps between ribbons was equal.
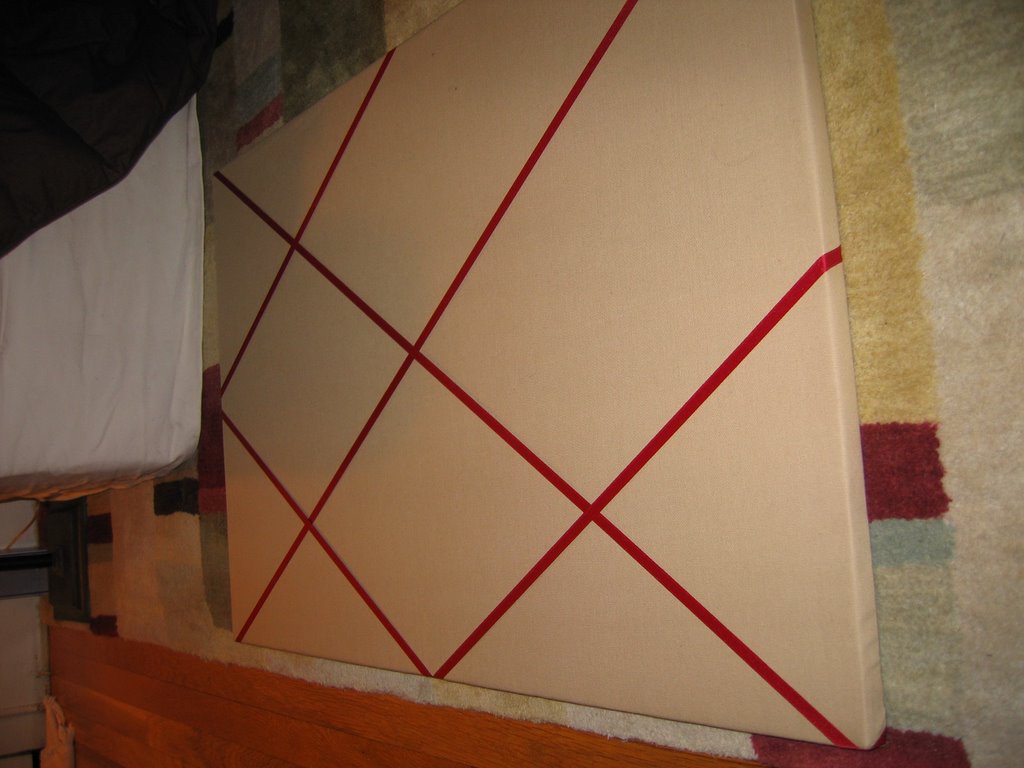
Make sense? For example, I'd measure halfway between the right side and the top, and make sure I was starting the ribbon in the middle on both sides. Once I'd done that in on the four corners, it formed a diamond shape on the picture board. Then I'd start stapling down the ribbon again on the diagonal.
In the picture above, three sides of the diagonal and the initial big X are done.
The only trick I didn't realize until it was complete, is that I could have alternated all the ribbons and they would have interlocked against each other, thereby keeping pictures from sliding underneath. It turned out cute in the end, though.

Here is the finished product!
I've been trying to decide whether I want to add little upholstery tacks at the intersection of each ribbon, or whether I like it as is. What do you all think?
It was a pretty fun project, and took me less than an hour once I'd collected enough materials. I assumed one roll of ribbon would be enough, but I used every last little bit of both rolls. I'll also be using the fabric to make a seat cushion and pillows for the guest bed. Maybe this weekend?
22 comments:
OMG - where do you have time for these things?! Arn't you a lawyer? You are obviously not billing enough. HA.
:)
VERY cute - jealous of your Martha Stewartness...
Hmmm...Martha had this on her show on either Monday or Tuesday as one of her most requested 'good things'. I would do thetacks because that will help the pictures stay in place and will make the ribbons more taut.
That is so pretty. I am preparing to cover a gigantic corkboard that we already have once I buy some fabric.
I like it the way it is, but the fabric tacks might help hold the pictures on and it will be pretty either way.
Oooh! You are so clever. It looks absolutely wonderful. I do agree that the tacks would be a good idea, especially for holding the photographs still.
Be sure to post pictures of your future craft projects...I love seeing other people's creativity. :)
Holy Crap.
That's some authentic looking stuff- That nad the tiled floor?
Dear Lord, don't let Terrance know that there are women like you out there. He might start getting "expectations".
I would like to now see coordinating dog outfits crafted to match these new projects
I am completely impressed. I would NEVER attempt something like that--which is a good thing. My friend Heidi made something similar that looks awesome, too. I need to start hanging out with less crafty/intelligent people, so I don't get a complex.
And yes! on the upholstery tacks.
Yes on the tacks! You can do those or decorative push pins. THings will stay better if the ribbon is also tacked.
Cool project. You rock!
and you started it at 11:00 p.m.?!?! I am totally impressed, and join the chorus that says yes, do the tacks.
My own linoleum-removal project, btw, didn't have quite the happy results yours did (but it might work out in the end anyway). Now you've got me wanting to make one of these boards for our soon-to-be-finished guest room!
Nice job! I'd try to find some picture postcards of the Eiffel Tower, and put them on as well! I wouldn't put tacks at EVERY intersection. Maybe every other one. That way, if you have a really large photo, you won't have to try to wedge it into a too small spot. I like the visual of the tacks, though.
I found a small Eiffel Tower bracelet charm at Claire's. Maybe you can find one somehwere near you, and attach it to the board as well. Since you've got the French theme and all....:)
It's beautiful!! I am so uncrafty, and lame, I would just buy it at PB. BUT, you will enjoy yours so much more, you should be proud. I know I am most proud of you!
;)
SO CUTE! Post of pic of it on the wall.
I'm totally and utterly impressed.
that turned out awesome! :) you crafty little thing, you.
Very cute, and yes I would do the tacks.
Wow, I am impressed with your craftiness! I like the upholstery tack idea.
Super cute! I always want these things when I see them, but I always tell myself, "You could make that." Then I never make it!
I have been searching for directions on how to do this. I have the materials and got to the ribbon part and didn't quite know where to begin. Thanks for the detailed description. Now I will go finish my board. Yours was beautiful.
Very helpful! Planning on making one this weekend.
Hi! I just found fabric in my house to do this project (I have become my mother) and will be replicating your design. Thanks and GREAT JOB!
Amy
My granddaughter is going to college, she picked out material
that had flowers on it, at each crisscross I punched through and
placed buttons that looked like
butterflies. The finished project
was so cute. When my youngest daughter graduated in 2001 I made
14 french bulletin boards as graduation presents, the girls picked material to match their dorm rooms.
Impressed. I'm going to cover the front of a couple (UGLY) wooden cabinet doord in my craft room. I never would have thought of the canvas! It's simpler than the regular wooden board, topped with quilt batting and then fabric that I had in mind.
I have just completed the first step of this project. I'm giving them as gifts to my 2 daughters. One I did in a black and white toile and I'm still looking for some nice velvet ribbon.I covered the other cork bulletin board with a nice washed denim and I plan to use a wool-type multi-colored ribbon (think Hippy) These instructions help alot. I'm using tacks as well -shiny black with the velvet and hammered brass for the denim. My sister gave me the fabric actually it was an old faded tablecloth-YEAH RECYCLE!!!
Post a Comment